
A buddy asked me how I braid the handles of my bags and why, so I decided to do a little tutorial. Not a video, because it is a pain to stop-rewind-play to get that ONE detail you missed. I took pics of the important steps that will get you going on your braiding way and help you untangle some of the tricks to it.
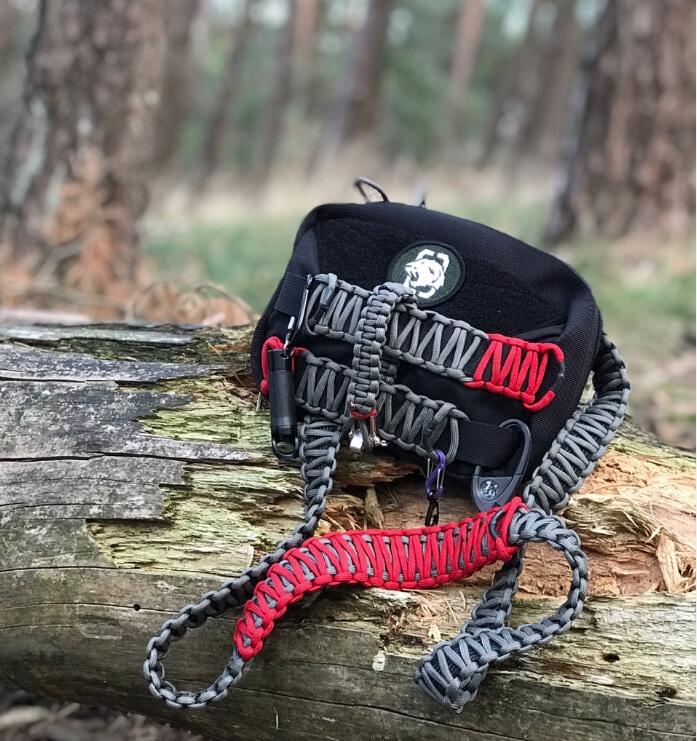
Oh why I braid? Apart from it looking good, I feel it makes for and easier carrying bag with a wider strap and softer feel.
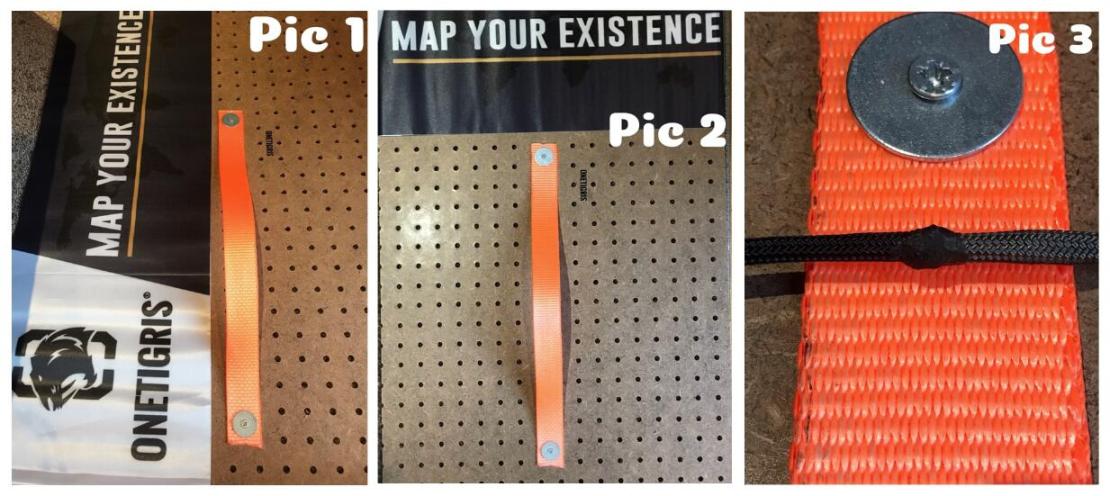
So let us pretend this orange strap in the photos is the handle of your bag. How would you start? Well let us decide what paracord to use first and then get an idea how much of it we will use. I use 550 Paracord type 3 – the 550 is how much weight it can handle in pounds. This cord is +/- 4mm thick and easy to work with. How much will you use? There are formulas but so many variables so let me just say that 5m is enough. I usually take a bit more than I may use and just cut off what I do not use – paracord really is cheap enough … (And for handles it is also easy enough to join two lengths of off-cut should you need a bit extra cord.)
In pic 3 you can see I joined two lengths of different color cord, I recommend you use one length and let my “joint” be the middle of your length of cord. For the tutorial it is easier to have two colors to show where the ropes go…
Start with the cord under and over your strap (this “strap” can really be anything you want to wrap in cord). The braid I’ll use is the Cobra-weave, probably the most common of paracord braiding “knots” and the most recognizable.
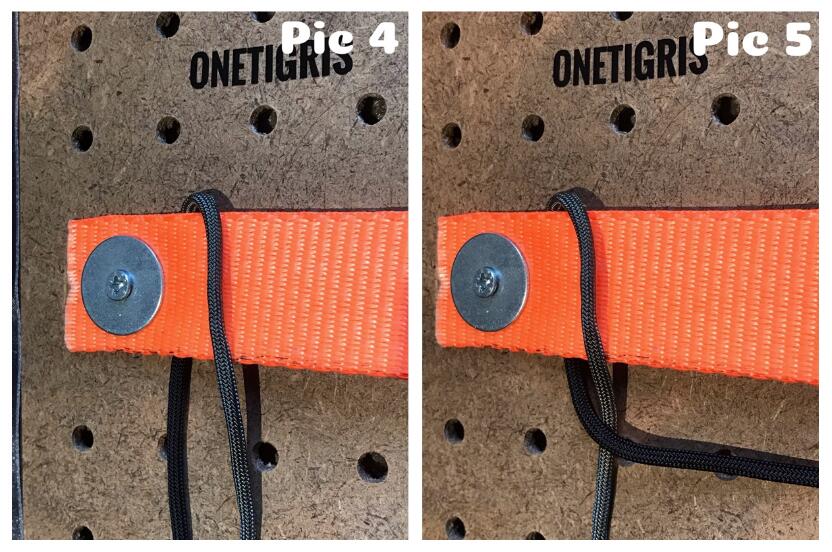
You can see I have the black cord “under” and the gray cord “over” the strap. From here on a little sentence I repeat: “Over, under the strap and through the eye.” (Yea sounds kinda kindergarden, but it WORKS!) Pic 5 is the “over” part of your sentence.
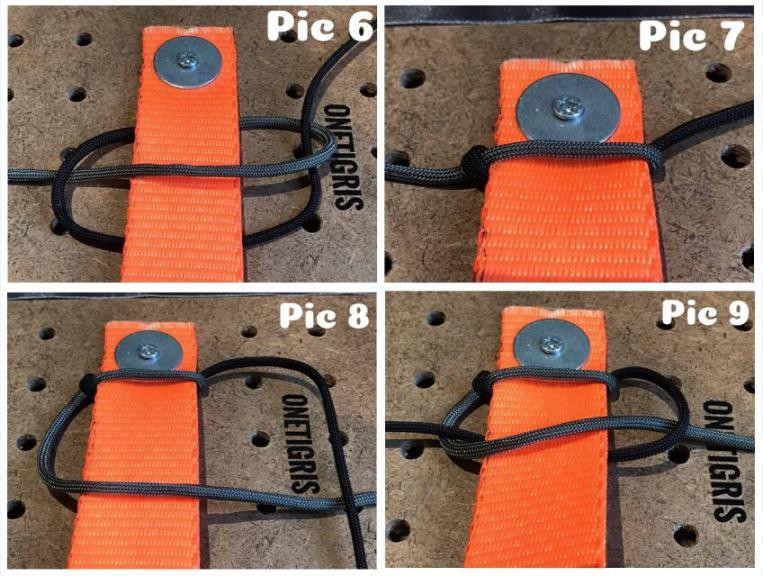
Pic 6 is the “under the strap and through the eye” part. Now here is another little “trick”: See the “bulge” the black cord does in pic 7 on the left side of the strap? That is you next sentence and a handy reference should you become “lost” along the way.
This is your “over, across and under” sentence. (If you manage to bungle your weaving, just untie the cord till you have this little bulge again and then repeat the sentence…)
Pic 8 “Over, across and under.” Under the black cord that is.
Pic 9 “Over, under and through the loop”.
That is black cord over the gray cord, under the strap and through the loop of the gray cord on the opposite side. Tada! Your first pass…
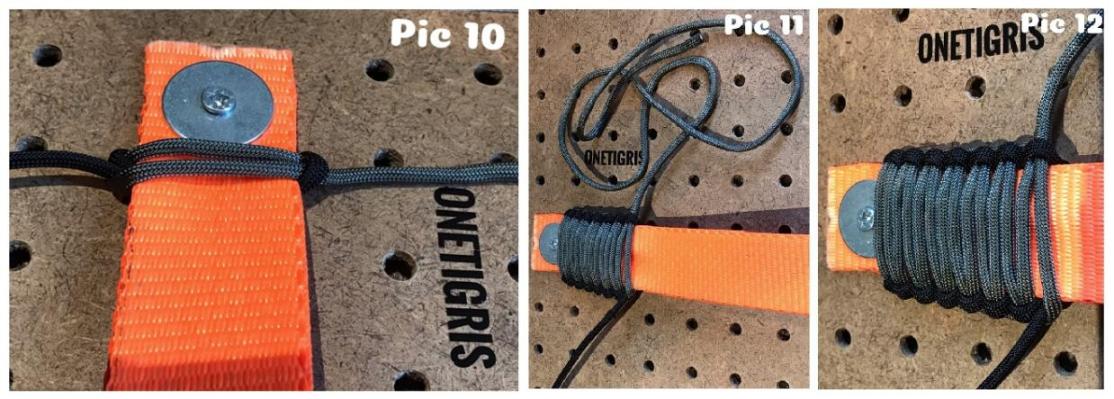
Now pull it nice and tight to give you what you see in Pic 10
You will notice the “bulge” is now on the right hand side of the strap. (Yup this will go on like this – left right, left right so it is easy to follow…) So after repeating this a zillion times you end up with a bit of a weave – Pic 11.
By now you have sworn a bit at the cord getting tangled while weaving so here is another tip: You will notice the gray cord always follow the one path of “over across and under” so I just bunch it up to keep it compact and easy to handle. The black cord is the one you get to thread and pull through every time to you need to keep that cord tidy…
With only 5m of cord this is not much of a deal, but if you are adventurous and start on some project that use 30m of cord you are in for a wild time.
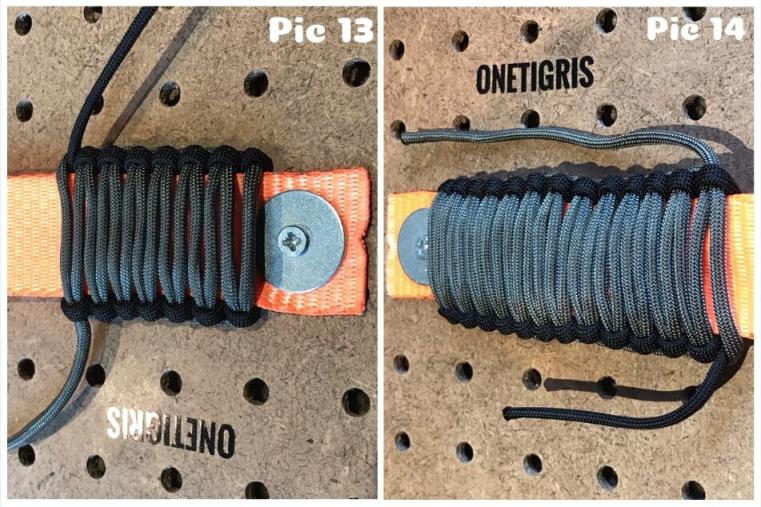
So let us pretend this is the end of the strap. See each pass have been pulled nice and tight and bunched up kinda neat. After inspecting your work and relaxing your fingers it is time to cut the ends. You will always end with one end being longer than the other – this is normal. You will notice sometimes the inner core of the cord pops out a bit – this is also normal and you can just trim it a bit with scissors or a knife.
I found that where you join two cords it was not always very neat and came up with a way to hide this joint: SHRINK-WRAP! (The kind you use to insulate electrical joints.) Cut a piece of 10 to 15mm and slip it over one end of the cord. Do it NOW or you WILL forget this till after you made the joint – you have been warned.Now it is TIME…to burn your fingers that is.
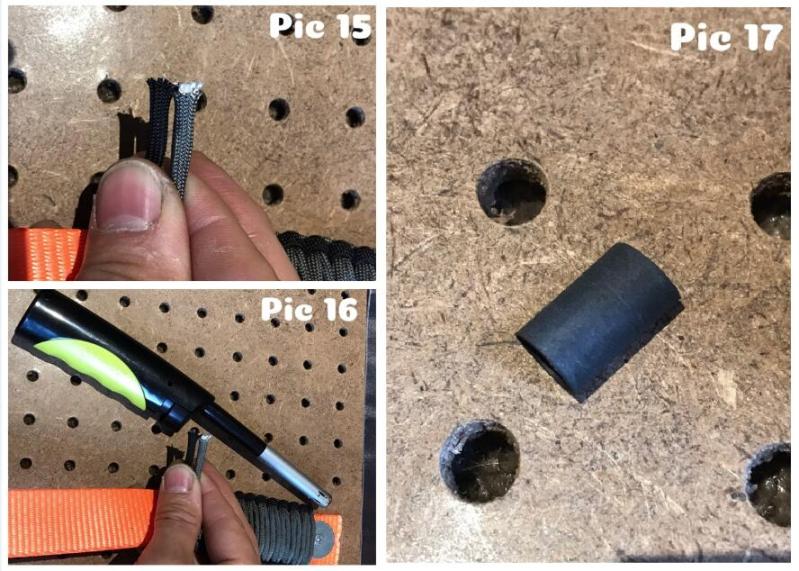
Melt the two ends of the cord with your lighter. It is better not to allow it to ignite the cord but I did it just for “effect”. Do not be afraid that things will cool down too fast – you really do have enough time to do this. Join the two melted ends (try to keep it neat and straight) if you are brave enough you might roll the joint between your fingers to get it flat and in shape (It really does not burn that much). Slip your piece of shrink-wrap over the joint (the piece I used was a bit too short, but you get the idea.)
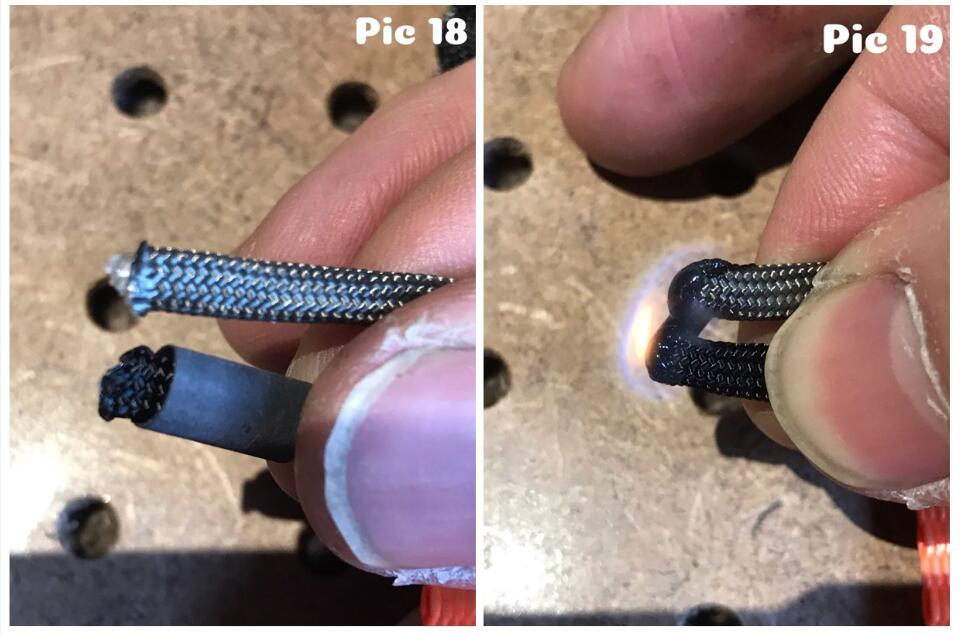
Reach for that lighter again. A word of caution: you do not want to melt or ignite this shrink-wrap so keep the flame some distance away – the heat will let the wrap shrink around the joint.
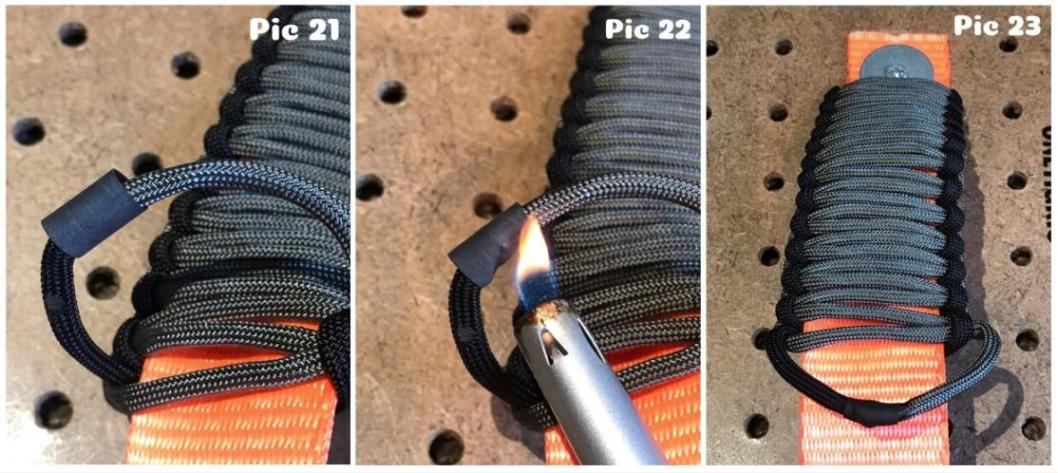
There is the joint nicely wrapped. While it is hot you can give it a bit of and arch by pulling at it. I just hook my finger in the loop and pull, but be careful because the wrapped part would retain some heat and it might burn a bit… and then you have your wrapped handle done!
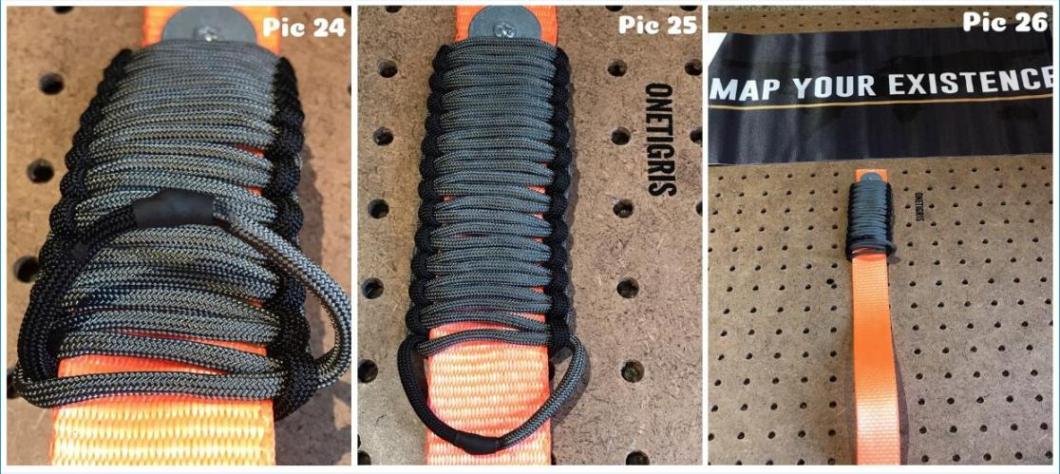
Keep the loop at the end compact – it is a good place to hang a carabiner shackle or key-ring.Here you can see why a bit longer wrapping would have covered the piece of cord that got melted.
Source: PacoWarabi (YouTube)
Credit: Sandspoor, OneTigris LiFE Ambassador
